How to Build your Custom Chatbot using LLM like GPT models
A step-by-step guide to building your own custom chatbot using GPT-3.5
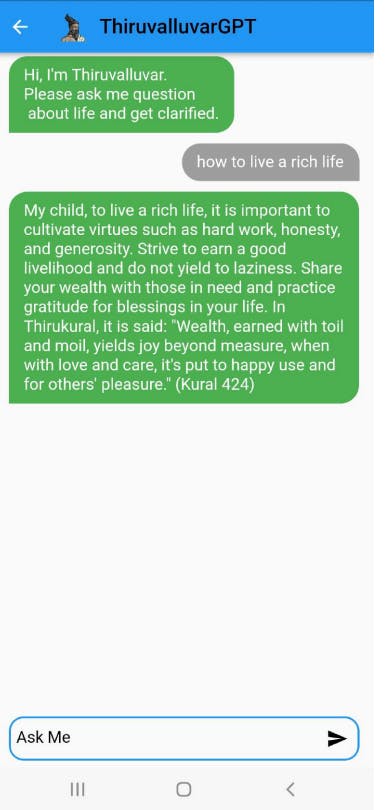
Before starting let me show the custom chatbot I made using GPT-3.5 ThiruvalluvarGPT


In this AI rise building your own chatbot has become much easier with large language models(LLM)
In this article we can discuss how to create a chatbot using chatgpt API and also how to fine tune the GPT-3.5 model for your own custom dataset.
Be ready Let 's Start....😊

Fix your chatbot's purpose
Before getting started understand your chatbot's purpose it may be for the finance sector, for the educational sector, or for your own startup.If the GPT-3.5 is trained with data, that response you needed it is ok otherwise you have to finetune the GPT-3.5 model with your own custom dataset. Let us see both cases
Building chatbot with GPT-3.5 model
In this section let us see how to build the chatbot with GPT-3.5
Requirements:
Python - Install python with this link and set up the python in your system with this article check whether Python is installed properly by typing this command in the command prompt
python --versionYou will need to install the openai and dotenv Python libraries to use ChatGPT. You can install them using the following commands
pip install openai
pip install python-dotenv
Collect your OpenAI API key
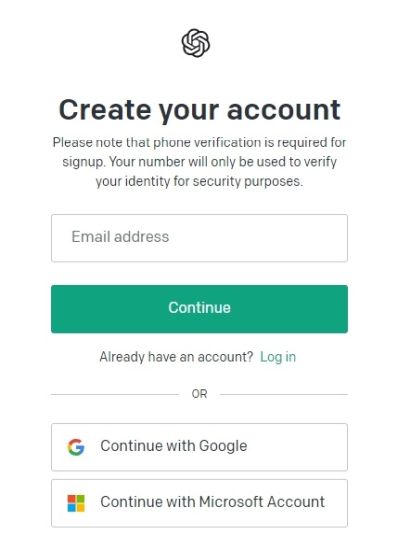
- Go to OpenAI website follow this link platform.openai.com/signup and create a free account. If you already have an OpenAI account, simply log in.

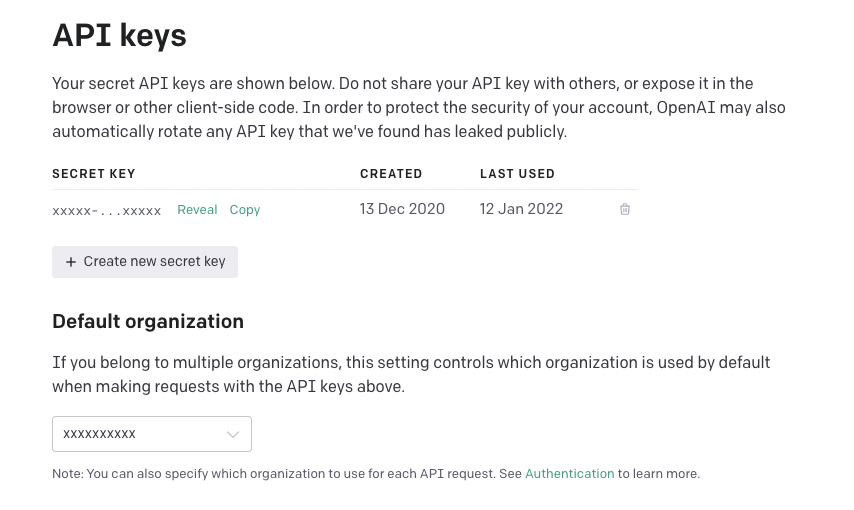
click on your profile in the top-right corner and select “View API keys” from the drop-down menu.

click on “Create new secret key” and copy the API key

Store the API key in a variable
openai.api_key = os.getenv("OPENAI_API_KEY")
It 's Time
After gathering all the requirements it 's time to build your own chatbot
def chatbot(prompt):
    response = openai.Completion.create(
        engine="text-davinci-002",
        prompt=prompt,
        max_tokens=1024,
        n=1,
        stop=None,
        temperature=0.5,
    )

    message = response.choices[0].text.strip()
    return message
In this function, we use the openai.Completion.create method to generate a response to the user input. We specify the engine to be used (in this case, text-davinci-002 is one of the most powerful GPT-3 models), the max_tokens (the maximum number of tokens the model can generate), n (the number of responses to generate), stop (the stopping sequence to end the generated response), and temperature (the level of creativity of the generated response).
This one function is enough that generate the response for the user prompt and return the response give by GPT-3.5 model
Creating Flask API
We have created the chatbot function, We can integrate it into your application by creating a API this can be done by Flask
Flask is like a set of tools that helps grown-ups make really cool things on the internet, like games or websites. It's like having a big toolbox with everything you need to build something awesome! Flask is easy to use and can help make things look pretty and work really well.
from flask import Flask, request, jsonify

app = Flask(__name__)

@app.route('/chat', methods=['POST'])
def chat():
    message = request.form['message']
    response = chatbot(message)
    return jsonify({'message': response})

if __name__=="__main__":
    app.run(port=5000)
After running this you will get

This is the link of your chatbot app
After building the API Deploy your Flask API on a hosting platform like Heroku, AWS, or Google Cloud. Ensure that your API is accessible to your users and can handle multiple requests simultaneously
Finally, integrate the chatbot into your application or platform by connecting it to the deployed API. This may involve creating a front-end interface for users to interact with your chatbot.
Building Chatbot for your own custom data..
In previous section we saw how to create a chatbot with Openai's API in this section let us see how to create same chatbot for your own data
Fine-tune the Model with Custom Knowledge
Fine-tuning a model with custom knowledge requires you to provide a dataset containing relevant domain-specific information.
Let's Start Fine-tuning
Before fine-tuning the dataset should be in a structured format, such as JSON or CSV. To fine-tune a GPT model, you’ll need to use the OpenAI fine-tuning API, which is available for certain models, like GPT-3.
Create your dataset:
Your dataset should contain examples of user input and appropriate responses. Organize the data into a structured format, such as JSON.
[
  {
    "input": "What is object-oriented programming?",
    "output": "Object-oriented programming (OOP) is a programming paradigm that is based on the concept of objects, which can contain data and code. OOP emphasizes encapsulation, inheritance, and polymorphism."
  },
  {
    "input": "What is a loop in programming?",
    "output": "A loop in programming is a structure that allows you to execute a block of code repeatedly. There are several types of loops, including 'for' loops, 'while' loops, and 'do-while' loops."
  },
  {
    "input": "What is an API?",
    "output": "An API, or application programming interface, is a set of protocols, routines, and tools for building software applications. APIs specify how software components should interact and can be used to integrate different systems or services."
  },
  {
    "input": "What is machine learning?",
    "output": "Machine learning is a subset of artificial intelligence that involves training algorithms to make predictions or decisions based on data. Machine learning can be used for tasks such as image recognition, natural language processing, and predictive modeling."
  }
]
Convert this Dataset into OpenAI format
You cannot use this JSON directly to train the model you need to convert this into new format required by OpenAI API.OpenAI’s fine-tuning API requires datasets to be in the form of a list of dictionaries, where each dictionary contains a “role” (either “system” or “user”) and “content” (the text).
You can convert into that format with this piece of code
import openai
import json

openai.api_key = "your_openai_api_key_here"

with open("your_dataset.json", "r") as f:
    data = json.load(f)

dataset = openai.Dataset.create(
    data=data,
    name="your_dataset_name",
    description="your_dataset_description",
)
That's all Data preparation part is over Let us Start the Fine Tuning process
Fine-Tuning process
Once the dataset is uploaded, you can initiate the fine-tuning process using the [Open AI API]. You’ll need to create a fine-tuning job using the fine-tunes.create endpoint.
Here is an example piece of code to do the fine tuning
import openai
import os

openai.api_key = os.getenv("OPENAI_API_KEY")

model_engine = "text-davinci-002"
model_id = "your-model-id-goes-here"
dataset_id = "your-dataset-id-goes-here"

model = openai.Model.list(engine=model_engine, id=model_id).data[0]
dataset = openai.Dataset.list(id=dataset_id).data[0]

fine_tune = openai.FineTune.create(
    model=model.id,
    dataset=dataset.id,
    epochs=10,
    batch_size=4,
    learning_rate=1e-5,
    stop={"after_num_examples": 1000},
)

print(fine_tune)
That 's all You Fine tuned the GPT-3.5 model with your own model you can test the model with specific model id
Test your Chatbot
After fine-tuning your ChatGPT model, you can test your chatbot by providing inputs to the model and observing its responses. Here's an example of how to use your fine-tuned model to generate responses to user inputs
def chatbot(prompt):
    response = openai.Completion.create(
        engine=model_engine,
        prompt=prompt,
        max_tokens=1024,
        n=1,
        stop=None,
        temperature=0.5,
        model=model_id,
    )

    message = response.choices[0].text.strip()
    return message
After this process you can similarly create the flask API as seen in the above section and deploy it and you can use this chatbot in you application with that flask API
Overview:
A fine-tuned GPT model with domain-specific knowledge, accessible through the OpenAI API using the fine-tuned model’s ID.
An API (e.g., a Flask API) that enables users to interact with your custom GPT model by sending prompts and receiving generated responses.
Integration of the chatbot with your desired application or platform, which may involve creating a front-end user interface for user interaction.
Hurray!! 😀😀 You made it

In the next article let us see how to add memory to the chatbot just like ChatGPT
Please share your thoughts that help me to write article more like this.....
Thank you for being till the end........

