Personalized Chatbot with GPT-3 model Flutter APP
Create your own Personalised chatbot with GPT-3 model Flutter App
Table of contents
- INTRODUCTION:
In This Blog, I am going to discuss how to create a chatbot with help of the GPT-3 model in the Flutter App.
I named it FUN CHAT you can name whatever you like
INTRODUCTION:
WHAT IS GPT-3?
GPT-3 (Generative Pre-trained Transformer 3) is a language generation model developed by OpenAI. It uses machine learning to generate human-like text and is trained on a massive dataset of over 570GB of text. GPT-3 is capable of a wide range of language tasks, such as translation, summarization, and question answering, and can also be fine-tuned for specific tasks such as content creation and conversation. It is considered to be one of the most advanced language models currently available.
Difference between ChatGPT and GPT:
GPT-3 and ChatGPT are both language generation models developed by OpenAI, but there are some key differences between the two.
GPT-3 is a much larger and more powerful model than ChatGPT. It is trained on a dataset of over 570GB of text and has 175 billion parameters, whereas ChatGPT is trained on a smaller dataset and has a smaller number of parameters.
Because of its larger size and more advanced training, GPT-3 can perform a wider range of language tasks, such as content creation, summarization, and translation. ChatGPT, on the other hand, is specifically designed for conversational tasks, such as answering questions and responding to user input in a conversational context.
Additionally, GPT-3 is available as a cloud-based API, which allows developers to access its capabilities and build applications that use its language generation capabilities. ChatGPT, on the other hand, is typically used in a conversational setting, such as within a chatbot or virtual assistant.
GPT-3 is a more powerful and versatile model that can be used for a wide range of language tasks, while ChatGPT is specifically designed for conversational tasks.
Why we are using GPT-3:
GPT-3 is available as a cloud-based API, which allows us to access its capabilities and build applications that use its language generation capabilities. So we're going to use this API and create Flutter App which serves as a personalized assistant
Let's Begin
Steps to build this Project:
- Create an Authentication (optional)
2. Create a Chat UI page
3. Access OpenAI 's GPT-3 model using the API call
4. Call GPT-3 API with a prompt given by the user and send the response to the user
STEP 1:
Create an Authentication Using Firebase this step is optional
In this first step, we Create a login page with help of Google firebase
ok let's start, first we create the user interface
Create a stateful widget in that return Scaffold widget this widget , scaffold widget has some predefined widget
 Widget build(BuildContext context) {
    return Scaffold(
      backgroundColor: animation.value,
      body: Padding(
        padding: EdgeInsets.symmetric(horizontal: 24.0),
        child: Column(
          mainAxisAlignment: MainAxisAlignment.center,
          crossAxisAlignment: CrossAxisAlignment.stretch,
          children: <Widget>[
            Row(
              children: <Widget>[
                Hero(
                  tag: 'logo',
                  child: Container(
                    child: Image.asset('images/bot.png'

                    ),

                    height: 100.0,
                  ),
                ),
               SizedBox(
                 width: 20.0,
               ),
                Text(
                  'FUN CHAT',
                  style: TextStyle(
                      fontSize: 45.0,
                      fontWeight: FontWeight.w900,
                      color:Colors.white
                  ),
                ),
              ],
            ),
            SizedBox(
              height: 48.0,
            ),
            Rounded_Button('Login',Colors.blue,LoginScreen.id),
            Rounded_Button('Register',Colors.blueAccent ,RegistrationScreen.id)
          ],
        ),
      ),
    );
  }
}
Here in this code, I Created Login Page with background color black with two rounded button (this button widget created in seprate file)
import 'package:flutter/material.dart';


class Rounded_Button extends StatelessWidget {
  Rounded_Button(this.text,this.color,this.name);
  final String text;
  final Color color;
  final String name;
  @override
  Widget build(BuildContext context) {
    return Padding(
      padding: EdgeInsets.symmetric(vertical: 16.0),
      child: Material(
        elevation: 5.0,
        color: color,
        borderRadius: BorderRadius.circular(30.0),
        child: MaterialButton(
          onPressed:(){
            Navigator.pushNamed(context, name);
          },
          minWidth: 200.0,
          height: 42.0,
          child: Text(
            text,
          ),
        ),
      ),
    );
  }
}
The entire code for login page
import 'package:chat_application2/screens/login_screen.dart';
import 'package:chat_application2/screens/registration_screen.dart';
import 'package:flutter/material.dart';
import 'package:chat_application2/components/rounded_button.dart';


class WelcomeScreen extends StatefulWidget {
  static String id='welcome_screen';
  @override
  _WelcomeScreenState createState() => _WelcomeScreenState();
}

class _WelcomeScreenState extends State<WelcomeScreen> with SingleTickerProviderStateMixin {
  late AnimationController controller;
  late Animation animation;

  @override
  void initState() {

    super.initState();
    controller=AnimationController(
      duration: Duration(seconds: 1),
      vsync:this,
    );

    animation=ColorTween(begin:Colors.blueGrey, end:Colors.black).animate(controller);
    controller.forward();
    controller.addListener(() {
      setState(() {

      });
      print(controller.value);
    });
    @override
    void dispose(){
      controller.dispose();
      super.dispose();
    }
  }
  Widget build(BuildContext context) {
    return Scaffold(
      backgroundColor: animation.value,
      body: Padding(
        padding: EdgeInsets.symmetric(horizontal: 24.0),
        child: Column(
          mainAxisAlignment: MainAxisAlignment.center,
          crossAxisAlignment: CrossAxisAlignment.stretch,
          children: <Widget>[
            Row(
              children: <Widget>[
                Hero(
                  tag: 'logo',
                  child: Container(
                    child: Image.asset('images/bot.png'

                    ),

                    height: 100.0,
                  ),
                ),
               SizedBox(
                 width: 20.0,
               ),
                Text(
                  'FUN CHAT',
                  style: TextStyle(
                      fontSize: 45.0,
                      fontWeight: FontWeight.w900,
                      color:Colors.white
                  ),
                ),
              ],
            ),
            SizedBox(
              height: 48.0,
            ),
            Rounded_Button('Login',Colors.blue,LoginScreen.id),
            Rounded_Button('Register',Colors.blueAccent ,RegistrationScreen.id)
          ],
        ),
      ),
    );
  }
}

next step is to create authentication using Google firebase for this you refer this blog
https://blog.codemagic.io/firebase-authentication-google-sign-in-using-flutter/
Step 2
Create a chat interface to interact with GPT-3
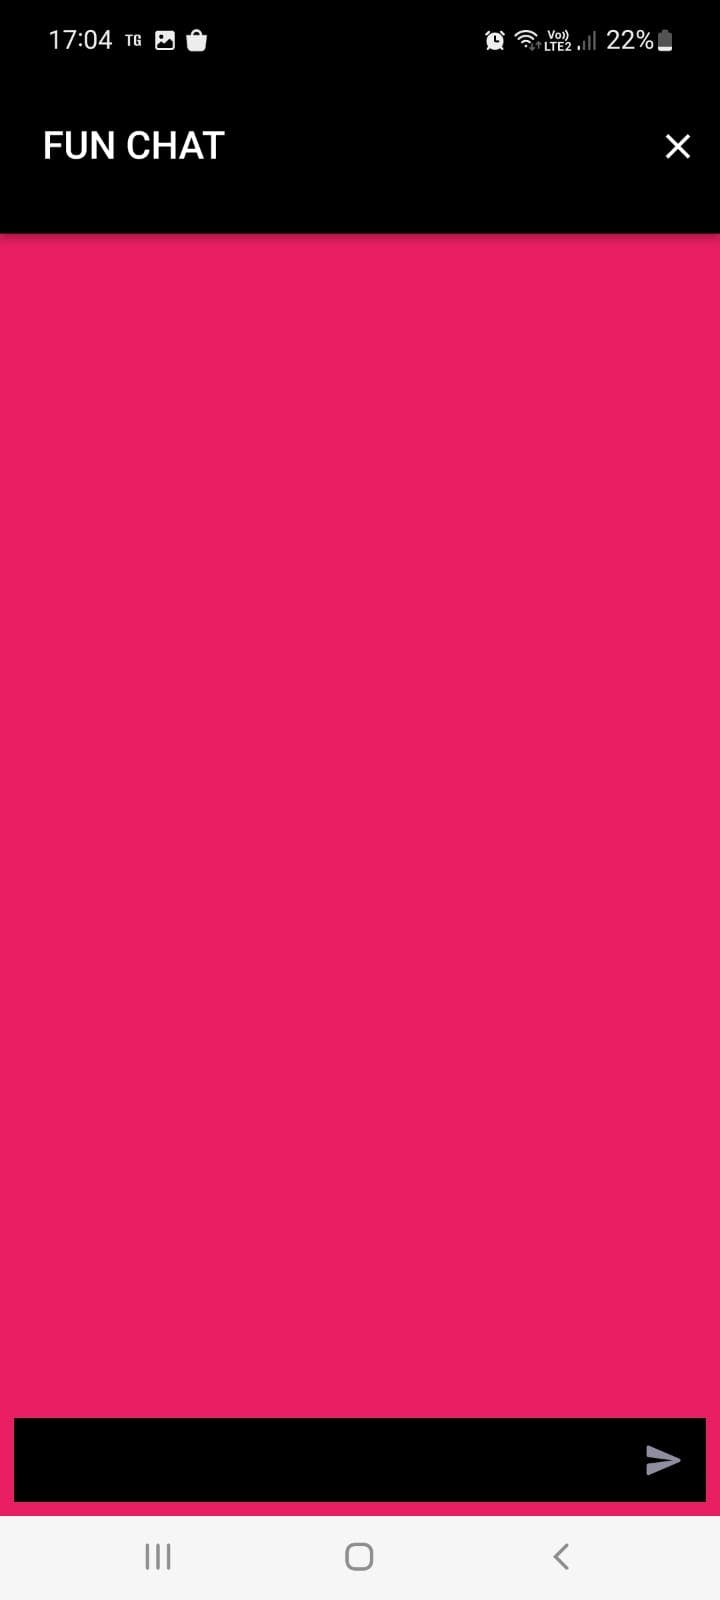
Once you log in you should be redirected to this page the entire code for this UI is given here I am not going to explain every piece of code for this UI here is the code
class _ChatPageState extends State<ChatPage> {
  final _textController = TextEditingController();
  final _scrollController = ScrollController();
  final _auth = FirebaseAuth.instance;
  final List<ChatMessage> _messages = [];
  late bool isLoading;

  @override
  void initState() {
    super.initState();
    isLoading = false;
  }

  @override
  Widget build(BuildContext context) {
    return Scaffold(
      appBar: AppBar(
        toolbarHeight: 100,
        title: const Padding(
          padding: EdgeInsets.all(8.0),
          child: Text(
            "FUN CHAT",
            maxLines: 2,
            textAlign: TextAlign.center,
          ),
        ),
        backgroundColor: botBackgroundColor,
        actions: <Widget>[
          IconButton(
              icon: Icon(Icons.close),
              onPressed: () {
                _auth.signOut();
                Navigator.pop(context);
              }),
        ],
      ),
      backgroundColor: backgroundColor,
      body: SafeArea(
        child: Column(
          children: [
            Expanded(
              child: _buildList(),
            ),
            Visibility(
              visible: isLoading,
              child: const Padding(
                padding: EdgeInsets.all(8.0),
                child: CircularProgressIndicator(
                  color: Colors.white,
                ),
              ),
            ),
            Padding(
              padding: const EdgeInsets.all(8.0),
              child: Row(
                children: [
                  _buildInput(),
                  _buildSubmit(),
                ],
              ),
            ),
          ],
        ),
      ),
    );
  }

  Widget _buildSubmit() {
    return Visibility(
      visible: !isLoading,
      child: Container(
        color: botBackgroundColor,
        child: IconButton(
          icon: const Icon(
            Icons.send_rounded,
            color: Color.fromRGBO(142, 142, 160, 1),
          ),
          onPressed: () async {
            setState(
              () {
                _messages.add(
                  ChatMessage(
                    text: _textController.text,
                    chatMessageType: ChatMessageType.user,
                  ),
                );
                isLoading = true;
              },
            );
            var input = _textController.text;
            _textController.clear();
            Future.delayed(const Duration(milliseconds: 50))
                .then((_) => _scrollDown());
            generateResponse(input).then((value) {
              setState(() {
                isLoading = false;
                _messages.add(
                  ChatMessage(
                    text: value,
                    chatMessageType: ChatMessageType.bot,
                  ),
                );
              });
            });
            _textController.clear();
            Future.delayed(const Duration(milliseconds: 50))
                .then((_) => _scrollDown());
          },
        ),
      ),
    );
  }

  Expanded _buildInput() {
    return Expanded(
      child: TextField(
        textCapitalization: TextCapitalization.sentences,
        style: const TextStyle(color: Colors.white),
        controller: _textController,
        decoration: const InputDecoration(
          fillColor: botBackgroundColor,
          filled: true,
          border: InputBorder.none,
          focusedBorder: InputBorder.none,
          enabledBorder: InputBorder.none,
          errorBorder: InputBorder.none,
          disabledBorder: InputBorder.none,
        ),
      ),
    );
  }

  ListView _buildList() {
    return ListView.builder(
      controller: _scrollController,
      itemCount: _messages.length,
      itemBuilder: (context, index) {
        var message = _messages[index];
        return ChatMessageWidget(
          text: message.text,
          chatMessageType: message.chatMessageType,
        );
      },
    );
  }

  void _scrollDown() {
    _scrollController.animateTo(
      _scrollController.position.maxScrollExtent,
      duration: const Duration(milliseconds: 300),
      curve: Curves.easeOut,
    );
  }
}

class ChatMessageWidget extends StatelessWidget {
  const ChatMessageWidget(
      {super.key, required this.text, required this.chatMessageType});

  final String text;
  final ChatMessageType chatMessageType;

  @override
  Widget build(BuildContext context) {
    return Container(
      margin: const EdgeInsets.symmetric(vertical: 10.0),
      padding: const EdgeInsets.all(16),
      color: chatMessageType == ChatMessageType.bot
          ? botBackgroundColor
          : backgroundColor,
      child: SingleChildScrollView(
        child: SingleChildScrollView(
          child: Row(
            crossAxisAlignment: CrossAxisAlignment.start,
            children: <Widget>[
              chatMessageType == ChatMessageType.bot
                  ? Container(
                      margin: const EdgeInsets.only(right: 16.0),
                      child: CircleAvatar(
                        child: Image.asset(
                          'images/bot.png',
                        ),
                      ),
                    )
                  : Container(
                      margin: const EdgeInsets.only(right: 16.0),
                      child: const CircleAvatar(
                        child: Icon(
                          Icons.person,
                        ),
                      ),
                    ),
              Expanded(
                child: Column(
                  crossAxisAlignment: CrossAxisAlignment.start,
                  children: <Widget>[
                    Container(
                      padding: const EdgeInsets.all(8.0),
                      decoration: const BoxDecoration(
                        borderRadius: BorderRadius.only(
                          topLeft: Radius.circular(18),
                          bottomLeft: Radius.circular(18),
                          bottomRight: Radius.circular(18),
                        ),
                      ),
                      child: Padding(
                        padding: const EdgeInsets.symmetric(
                            vertical: 10.0, horizontal: 10.0),
                        child: Text(
                          text,
                          style: Theme.of(context)
                              .textTheme
                              .bodyLarge
                              ?.copyWith(color: Colors.white),
                        ),
                      ),
                    ),
                  ],
                ),
              ),
            ],
          ),
        ),
      ),
    );
  }
}
you can change the color as to your preference the main purpose is get the input from user and send that query to GPT- 3 model using OpenAI 's API in next step let us see that

Step 3
Call GPT-3 API with a prompt given by the user and send the response to the user
This is the main step, In this step first
Get your API token from OpenAI 's website this link
after that create constant
final apiKey = "sk-Ix19Ixxxxxxxxxxxxxxxxxxxxx";
after getting your API key we should make a request
{
  "model": "text-davinci-003",
  "prompt": prompt,
  "temperature": 0,
  "max_tokens": 2000
}
This request queries the Davinci model to complete the text starting with a prompt you sent from your user input. The max_tokens parameter sets an upper bound on how many tokens the API will return. The temperature means the model will take more risks. Try 0.9 for more creative applications, and 0 for ones with a well-defined answer.
The response looks like this
{
"id": "cmpl-GERzeJQ4lvqPk8SkZu4XMIuR",
"object": "text_completion",
"created": 1586839808,
"model": "text-davinci:003",
"choices": [
{
"text": "\n\nThis is indeed a test",
"index": 0,
"logprobs": null,
"finish_reason": "length"
}
],
"usage": {
"prompt_tokens": 5,
"completion_tokens": 7,
"total_tokens": 12
}
}
Future<String> generateResponse(String prompt) async {
  final apiKey = "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";

  var url = Uri.https("api.openai.com", "/v1/completions");
  final response = await http.post(
    url,
    headers: {
      'Content-Type': 'application/json',
      'Authorization': 'Bearer $apiKey'
    },
    body: jsonEncode({
      "model": "text-davinci-003",
      "prompt": prompt,
      'temperature': 0,
      'max_tokens': 2000,
      'top_p': 1,
      'frequency_penalty': 0.0,
      'presence_penalty': 0.0,
    }),
  );

  // Do something with the response
  Map<String, dynamic> newresponse = jsonDecode(response.body);
  return newresponse['choices'][0]['text'];
}
this function Create generates a response for the prompt given by the user
after that, we want to send the response to the user
the entire code for this chatgpt page is
 import 'dart:convert';
import 'package:flutter/material.dart';
import 'package:http/http.dart' as http;
import 'package:firebase_auth/firebase_auth.dart';

import 'model.dart';

void main() {
  runApp(const MyApp());
}

class MyApp extends StatelessWidget {
  static String id = 'Chatgpt';
  const MyApp({Key? key}) : super(key: key);

  @override
  Widget build(BuildContext context) {
    return const MaterialApp(
      home: ChatPage(),
      debugShowCheckedModeBanner: false,
    );
  }
}

const backgroundColor = Colors.pink;
const botBackgroundColor = Colors.black;

class ChatPage extends StatefulWidget {
  const ChatPage({super.key});

  @override
  State<ChatPage> createState() => _ChatPageState();
}

Future<String> generateResponse(String prompt) async {
  final apiKey = "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";

  var url = Uri.https("api.openai.com", "/v1/completions");
  final response = await http.post(
    url,
    headers: {
      'Content-Type': 'application/json',
      'Authorization': 'Bearer $apiKey'
    },
    body: jsonEncode({
      "model": "text-davinci-003",
      "prompt": prompt,
      'temperature': 0,
      'max_tokens': 2000,
      'top_p': 1,
      'frequency_penalty': 0.0,
      'presence_penalty': 0.0,
    }),
  );

  // Do something with the response
  Map<String, dynamic> newresponse = jsonDecode(response.body);
  return newresponse['choices'][0]['text'];
}

class _ChatPageState extends State<ChatPage> {
  final _textController = TextEditingController();
  final _scrollController = ScrollController();
  final _auth = FirebaseAuth.instance;
  final List<ChatMessage> _messages = [];
  late bool isLoading;

  @override
  void initState() {
    super.initState();
    isLoading = false;
  }

  @override
  Widget build(BuildContext context) {
    return Scaffold(
      appBar: AppBar(
        toolbarHeight: 100,
        title: const Padding(
          padding: EdgeInsets.all(8.0),
          child: Text(
            "FUN CHAT",
            maxLines: 2,
            textAlign: TextAlign.center,
          ),
        ),
        backgroundColor: botBackgroundColor,
        actions: <Widget>[
          IconButton(
              icon: Icon(Icons.close),
              onPressed: () {
                _auth.signOut();
                Navigator.pop(context);
              }),
        ],
      ),
      backgroundColor: backgroundColor,
      body: SafeArea(
        child: Column(
          children: [
            Expanded(
              child: _buildList(),
            ),
            Visibility(
              visible: isLoading,
              child: const Padding(
                padding: EdgeInsets.all(8.0),
                child: CircularProgressIndicator(
                  color: Colors.white,
                ),
              ),
            ),
            Padding(
              padding: const EdgeInsets.all(8.0),
              child: Row(
                children: [
                  _buildInput(),
                  _buildSubmit(),
                ],
              ),
            ),
          ],
        ),
      ),
    );
  }

  Widget _buildSubmit() {
    return Visibility(
      visible: !isLoading,
      child: Container(
        color: botBackgroundColor,
        child: IconButton(
          icon: const Icon(
            Icons.send_rounded,
            color: Color.fromRGBO(142, 142, 160, 1),
          ),
          onPressed: () async {
            setState(
              () {
                _messages.add(
                  ChatMessage(
                    text: _textController.text,
                    chatMessageType: ChatMessageType.user,
                  ),
                );
                isLoading = true;
              },
            );
            var input = _textController.text;
            _textController.clear();
            Future.delayed(const Duration(milliseconds: 50))
                .then((_) => _scrollDown());
            generateResponse(input).then((value) {
              setState(() {
                isLoading = false;
                _messages.add(
                  ChatMessage(
                    text: value,
                    chatMessageType: ChatMessageType.bot,
                  ),
                );
              });
            });
            _textController.clear();
            Future.delayed(const Duration(milliseconds: 50))
                .then((_) => _scrollDown());
          },
        ),
      ),
    );
  }

  Expanded _buildInput() {
    return Expanded(
      child: TextField(
        textCapitalization: TextCapitalization.sentences,
        style: const TextStyle(color: Colors.white),
        controller: _textController,
        decoration: const InputDecoration(
          fillColor: botBackgroundColor,
          filled: true,
          border: InputBorder.none,
          focusedBorder: InputBorder.none,
          enabledBorder: InputBorder.none,
          errorBorder: InputBorder.none,
          disabledBorder: InputBorder.none,
        ),
      ),
    );
  }

  ListView _buildList() {
    return ListView.builder(
      controller: _scrollController,
      itemCount: _messages.length,
      itemBuilder: (context, index) {
        var message = _messages[index];
        return ChatMessageWidget(
          text: message.text,
          chatMessageType: message.chatMessageType,
        );
      },
    );
  }

  void _scrollDown() {
    _scrollController.animateTo(
      _scrollController.position.maxScrollExtent,
      duration: const Duration(milliseconds: 300),
      curve: Curves.easeOut,
    );
  }
}

class ChatMessageWidget extends StatelessWidget {
  const ChatMessageWidget(
      {super.key, required this.text, required this.chatMessageType});

  final String text;
  final ChatMessageType chatMessageType;

  @override
  Widget build(BuildContext context) {
    return Container(
      margin: const EdgeInsets.symmetric(vertical: 10.0),
      padding: const EdgeInsets.all(16),
      color: chatMessageType == ChatMessageType.bot
          ? botBackgroundColor
          : backgroundColor,
      child: SingleChildScrollView(
        child: SingleChildScrollView(
          child: Row(
            crossAxisAlignment: CrossAxisAlignment.start,
            children: <Widget>[
              chatMessageType == ChatMessageType.bot
                  ? Container(
                      margin: const EdgeInsets.only(right: 16.0),
                      child: CircleAvatar(
                        child: Image.asset(
                          'images/bot.png',
                        ),
                      ),
                    )
                  : Container(
                      margin: const EdgeInsets.only(right: 16.0),
                      child: const CircleAvatar(
                        child: Icon(
                          Icons.person,
                        ),
                      ),
                    ),
              Expanded(
                child: Column(
                  crossAxisAlignment: CrossAxisAlignment.start,
                  children: <Widget>[
                    Container(
                      padding: const EdgeInsets.all(8.0),
                      decoration: const BoxDecoration(
                        borderRadius: BorderRadius.only(
                          topLeft: Radius.circular(18),
                          bottomLeft: Radius.circular(18),
                          bottomRight: Radius.circular(18),
                        ),
                      ),
                      child: Padding(
                        padding: const EdgeInsets.symmetric(
                            vertical: 10.0, horizontal: 10.0),
                        child: Text(
                          text,
                          style: Theme.of(context)
                              .textTheme
                              .bodyLarge
                              ?.copyWith(color: Colors.white),
                        ),
                      ),
                    ),
                  ],
                ),
              ),
            ],
          ),
        ),
      ),
    );
  }
}
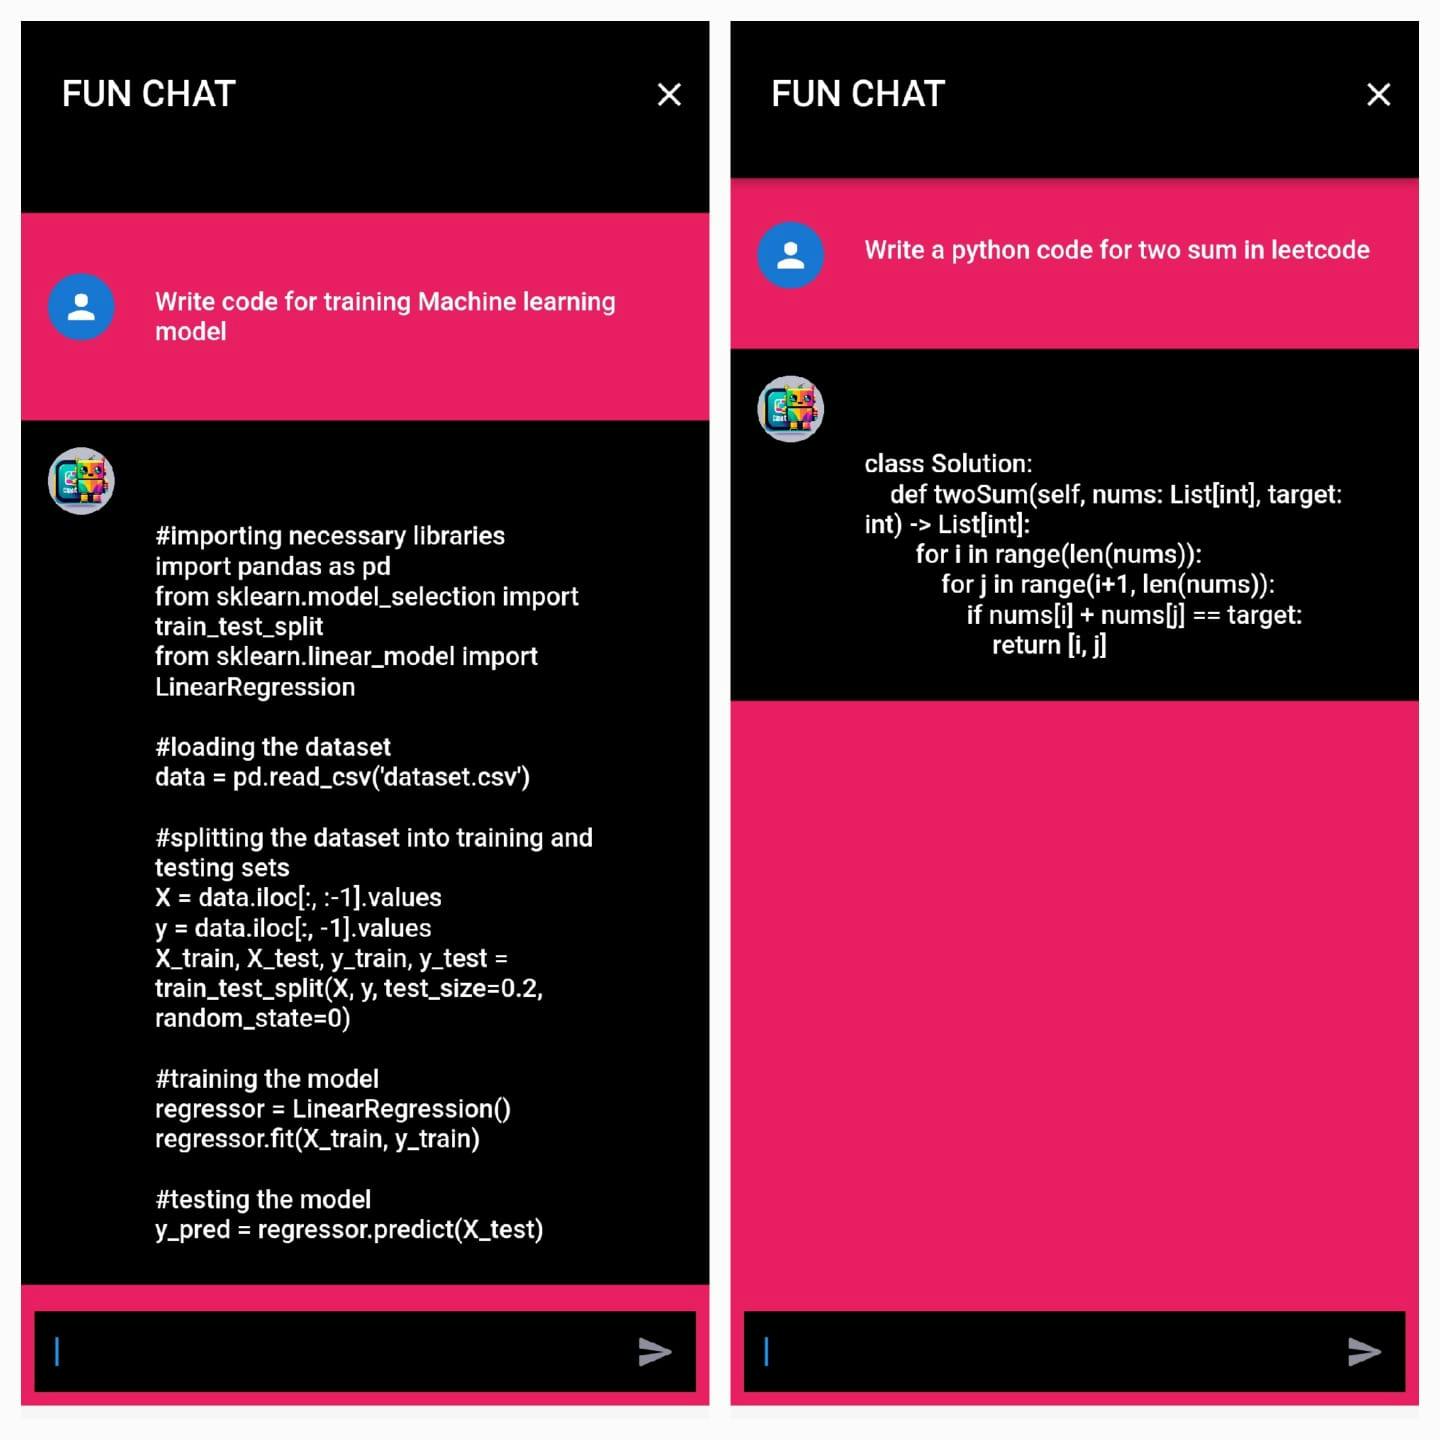
RESULTS:

Done Guys❤️
If you want to download this app
Download from this website
If You Like my work follow my blog and drop down your comments
